

Once you have your image cropped to the proper pixel dimensions and aspect ratio, follow these steps to compress and optimize your images.
How to prepare images for multiple screen sizes and resolutions
STEP 1: Save image from Photoshop
- For CS5 & CS6 - Go to File > Save for Web.
- For CC - Go to File > Export... > Save for Web (Legacy)
- Make sure your file is properly named with no spaces, capitalizations, or special characters. You may separate words with a hyphen, but don't use an underscore.
- For format, select JPEG.
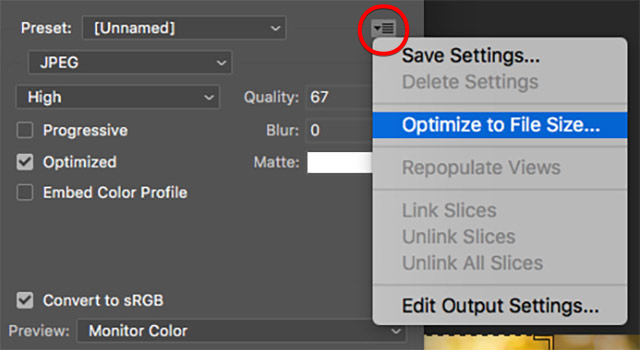
STEP 2: Target File Size
- Using the chart on the overview page, determine your target file size.
- In the "Save for Web" dialog, use the "Optimize Menu" to input file size.
- Enter the "Desired file size."
- Use the "2-Up" viewer to review the results.
STEP 3: Optimize with Kraken.io
Kraken is a free online service that compresses images for the web.
- Go to Kraken.io.
- Upload your image for compression.
- Download the new compressed version.
STEP 4: Upload to the WCMS
If you're working within our content management system:
- Go to the proper subfolder in the images folder.
- Select NEW > DEFAULT > FILE.
- Upload your file.
- Enter the alt text, which is attached to the image file. Select EDIT > METADATA and enter the alt text in the SUMMARY field. Learn how to write effective alt text in our accessibility guide.